How to Bulk Upload Raw Condition Data
Objective: Gain an understanding of how to upload multiple Asset condition records using the Data Exchange module.
Outcome: By following these steps, a user will be able to upload bulk raw condition data records.
Prerequisites: This action requires some things to be completed prior to commencing.
- Asset Record must exist in the database.
- Raw condition data has already been collected in a spreadsheet.
Preparing Condition Data for Upload
Raw condition data is used to capture and display large amounts of data about the condition of multiple assets, typically as the result of an audit.
This data is imported as a .csv file using the Data Exchange module, relying on a custom assessment form and an existing Assetic assessment task. The first step in importing the raw condition data is using a condition data spreadsheet to determine which fields will need to be imported into Assetic.
Once the required fields have been identified, the next step is to create a custom assessment form which matches the required fields. For information on how to create a custom assessment form, please read this article. The fields in the custom form must match the required fields as identified in the condition data spreadsheet.
Following the creation of a form, the next step is to create an assessment project in Assetic Assessments and add the form to that project. Details about how to create a project and add a form are found here.
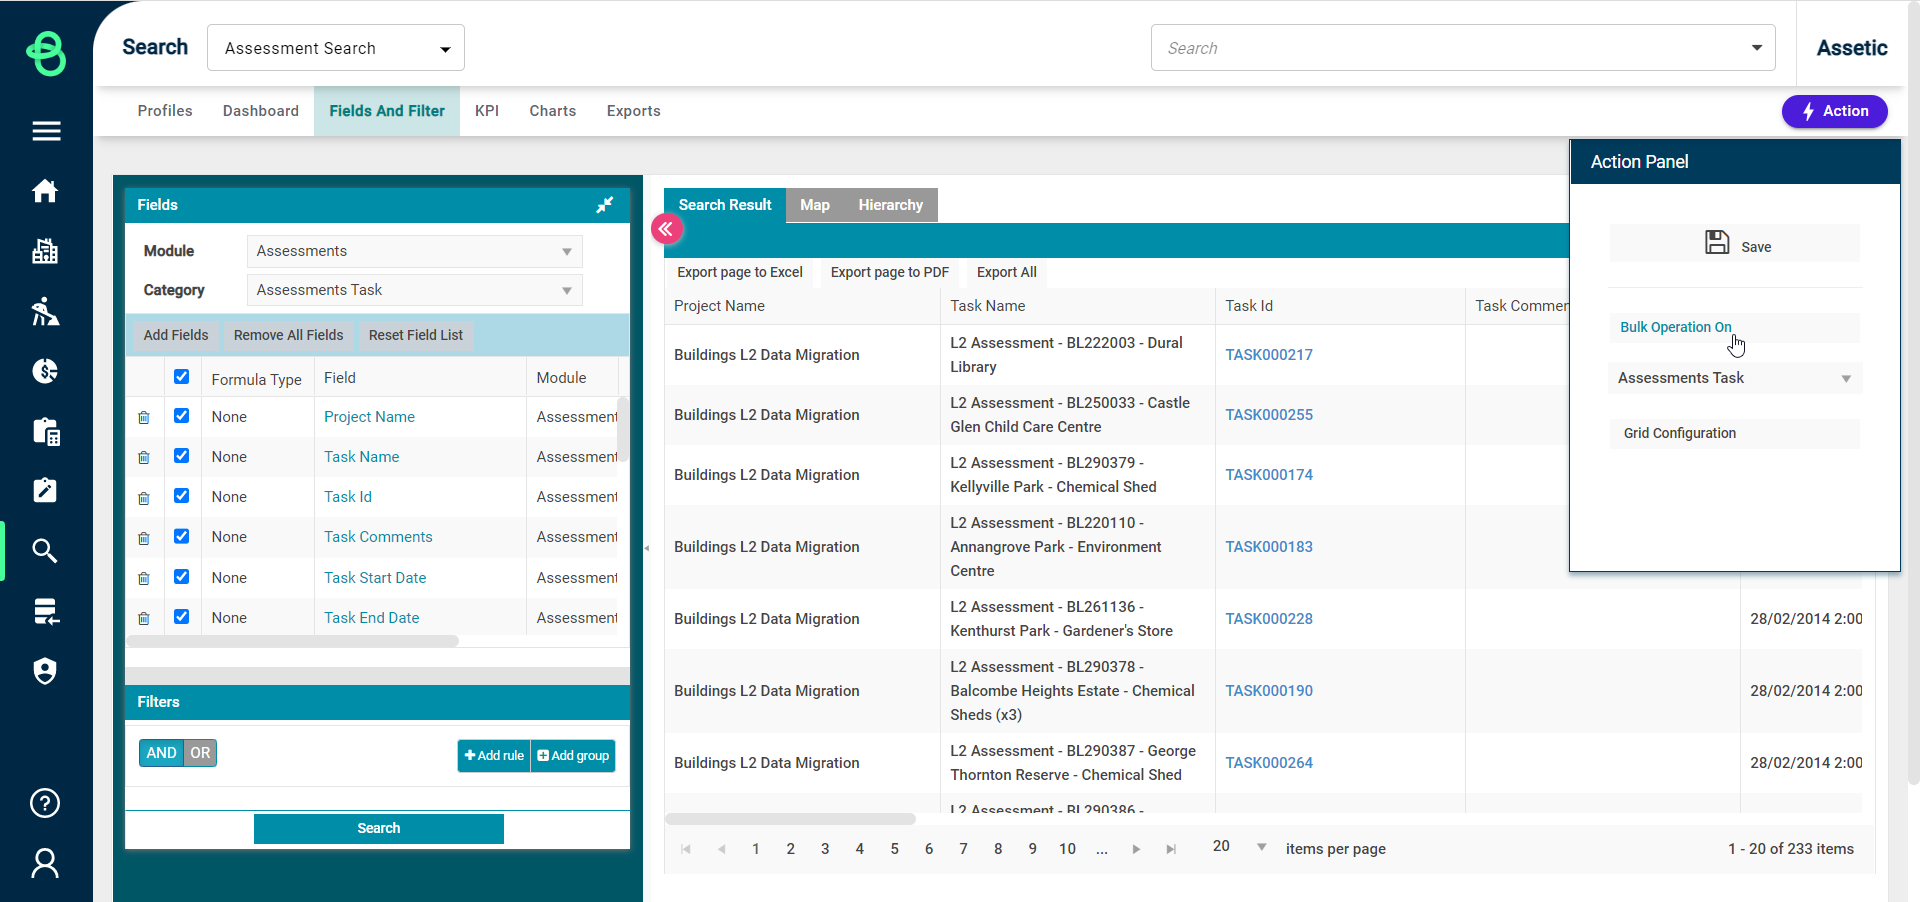
With the project created and the form added, assessment tasks in the assessment project must be created for all assets that have condition data. This can be done manually by navigating to the Assets and selecting 'Create Assessment Task' in the Actions menu. Alternatively, it can be performed in bulk by using an Advanced Search Profile to match all the relevant Assets and selecting 'Bulk Operation On' in the Actions menu:
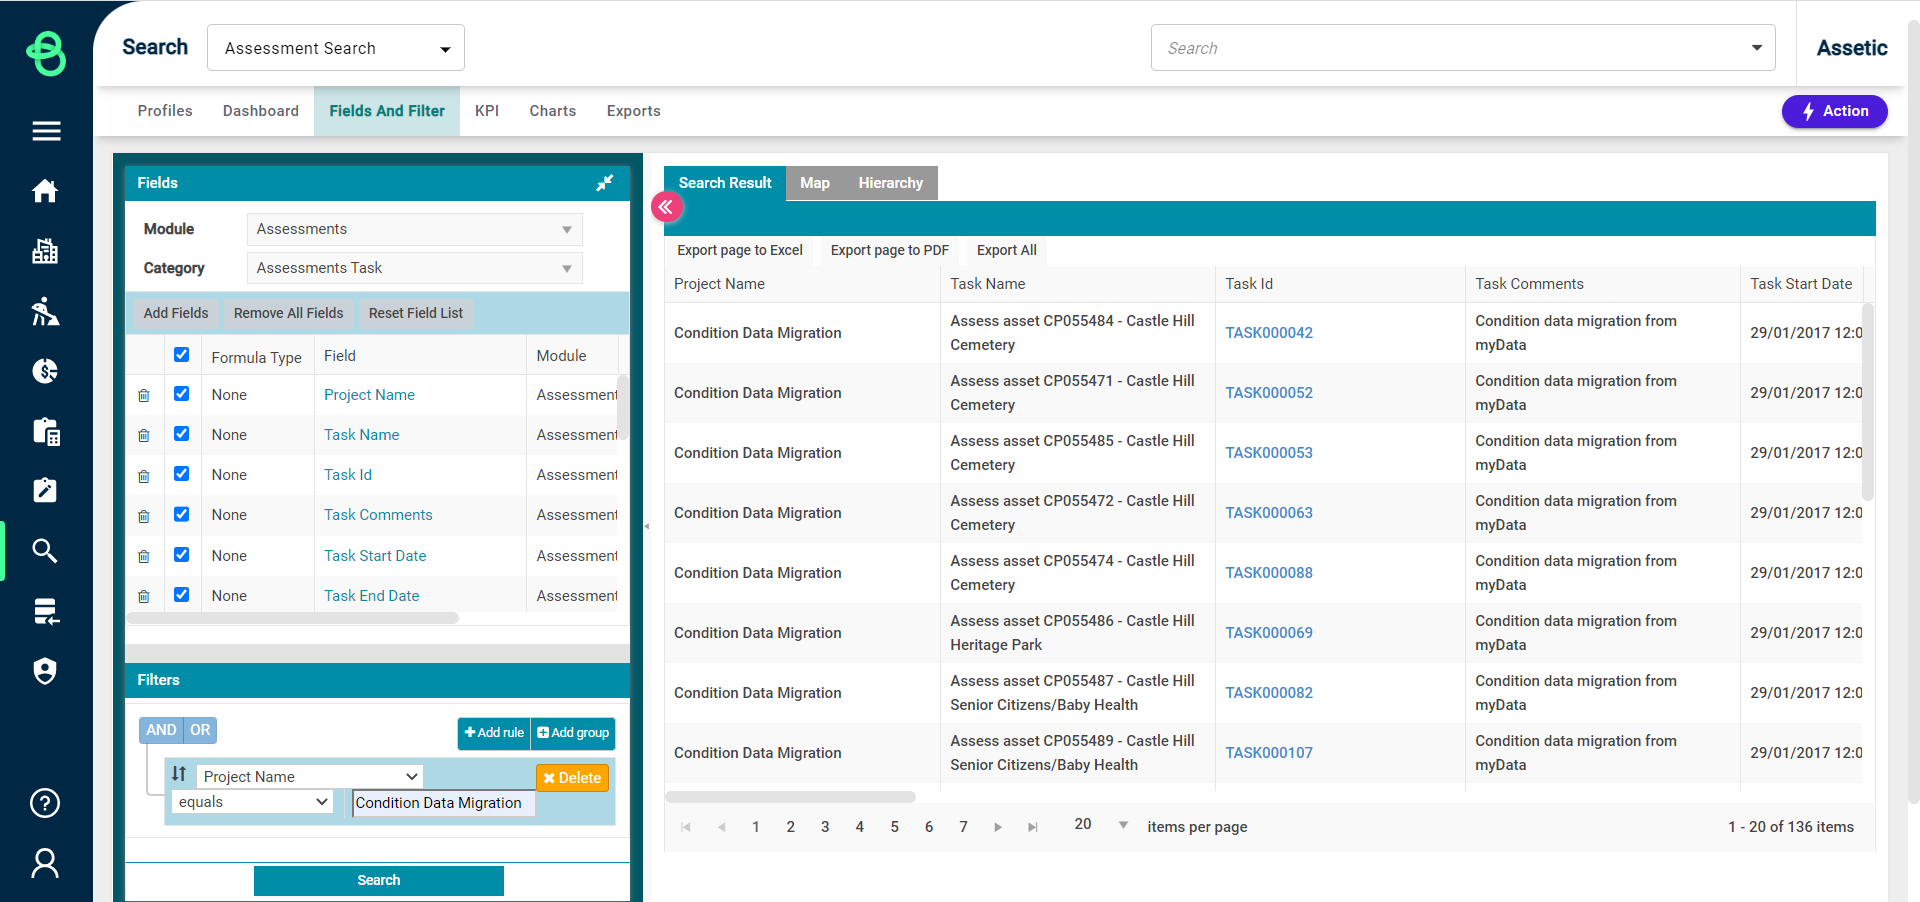
Once each Asset has an associated Task, the Task ID and Asset ID for each of the assessment tasks can be collected. This is done using the Advanced Search module, searching within the Assessments Module against the Assessments Tasks Category, filtering the search on the specific Project Name, and then exporting the results.
Add a field to the condition data spreadsheet to track the Task ID, and use the freshly exported Search results in a vlookup to populate the Task ID field in the condition spreadsheet, using the Asset ID as the key linking field. When this is done successfully, the raw condition data spreadsheet will now contain information that links all the data to a corresponding Task within Assetic.
Next, ensure that the condition data spreadsheet contains the following fields, fully populated:
-
Form Assessed By
-
Form End Time (date in dd/mm/yyyy format)
-
Form Start Time (date in dd/mm/yyyy format)
-
Form Skipped (Either TRUE/FALSE)
-
Form Skipped Reason (Can be null if Form Skipped was FALSE)
With the above steps completed, the .csv file can be uploaded to Assetic.
Uploading Assessment Data Using Data Exchange
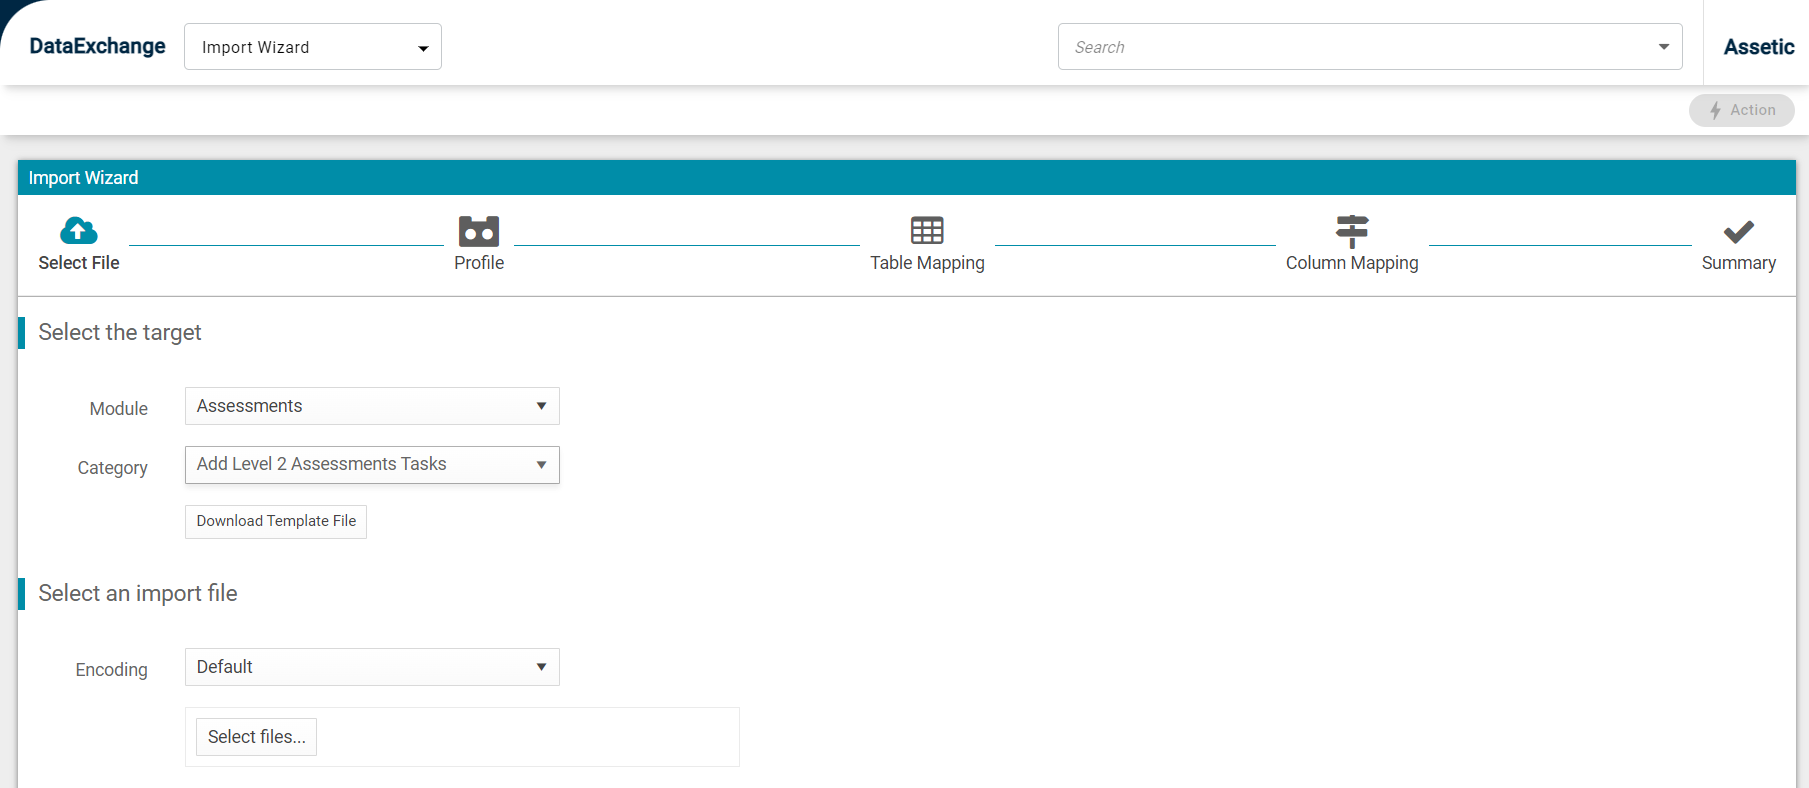
To upload the condition data, navigate to 'Data Exchange' using the Primary Navigation Menu, and then select 'Import Wizard' from the secondary Navigation Menu.
In the Import Wizard select 'Assessments' as the target from the Module dropdown and then choose the custom form used for the assessments from the 'Category' dropdown.
Finally, use the 'Select Files' button to navigate to the .csv file.
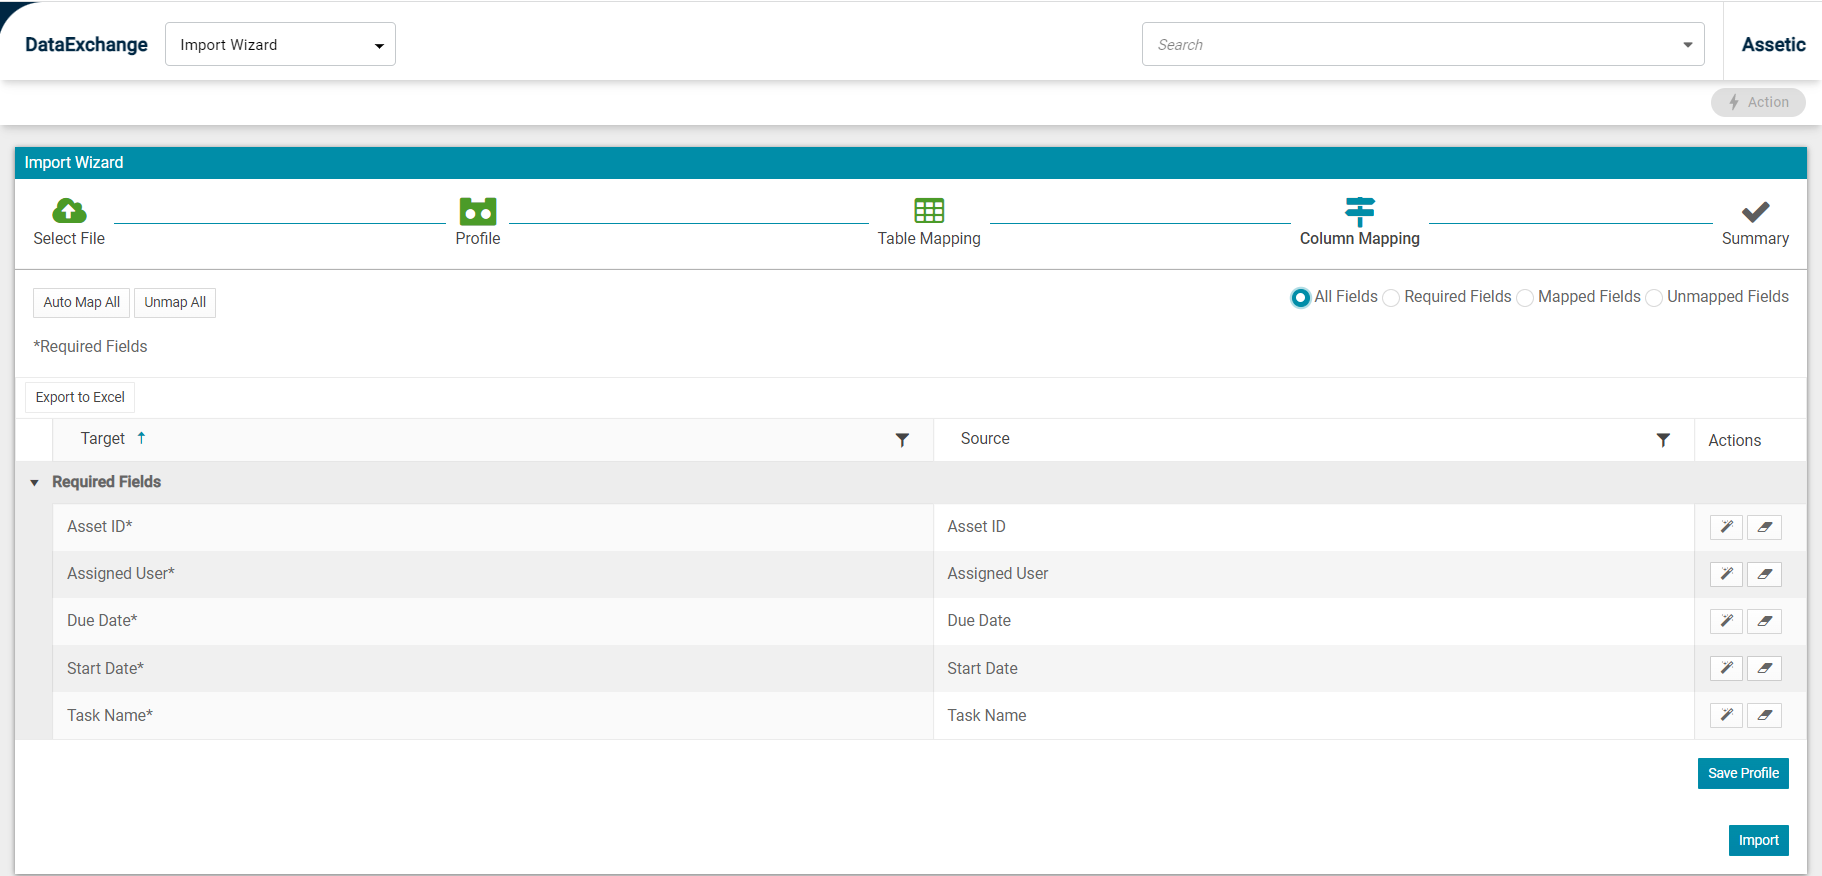
The Import Wizard will require mapping of the form fields to the file column data.
This is done in the Column Mapping step of the wizard.
When all required fields have been mapped select the Import button to begin the import.
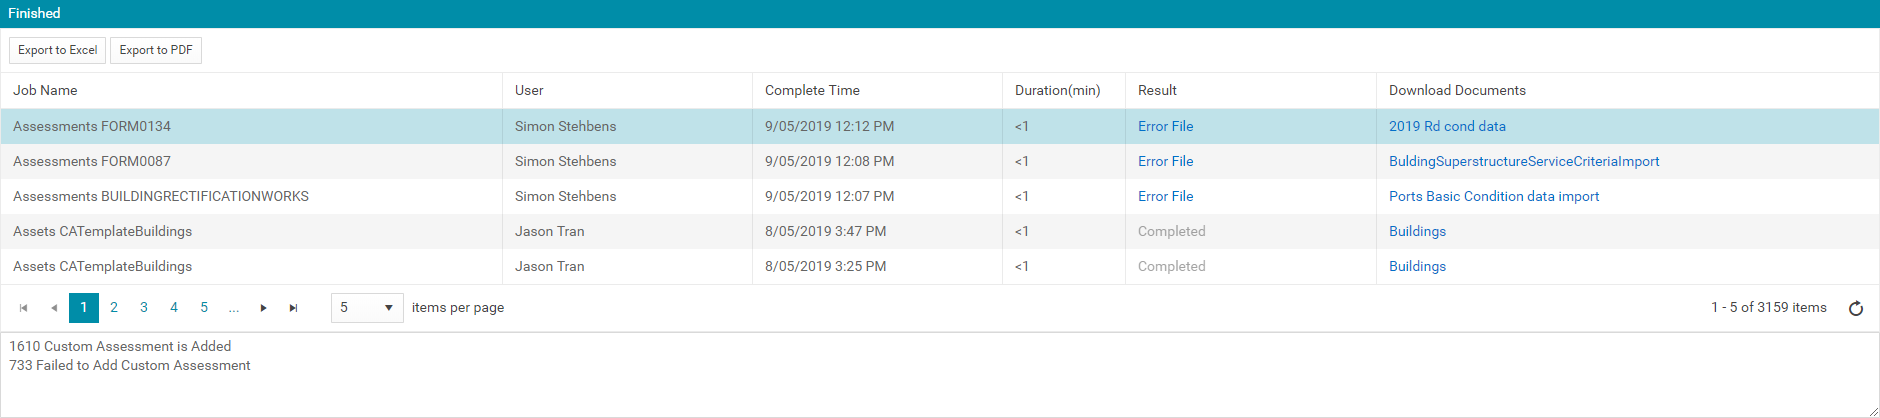
The progress of the import can be viewed by navigating to the 'Import History' secondary Navigation Menu. Any jobs being processed will display in the 'In Progress' window. When the import is finished the result will be displayed in the Finished window.
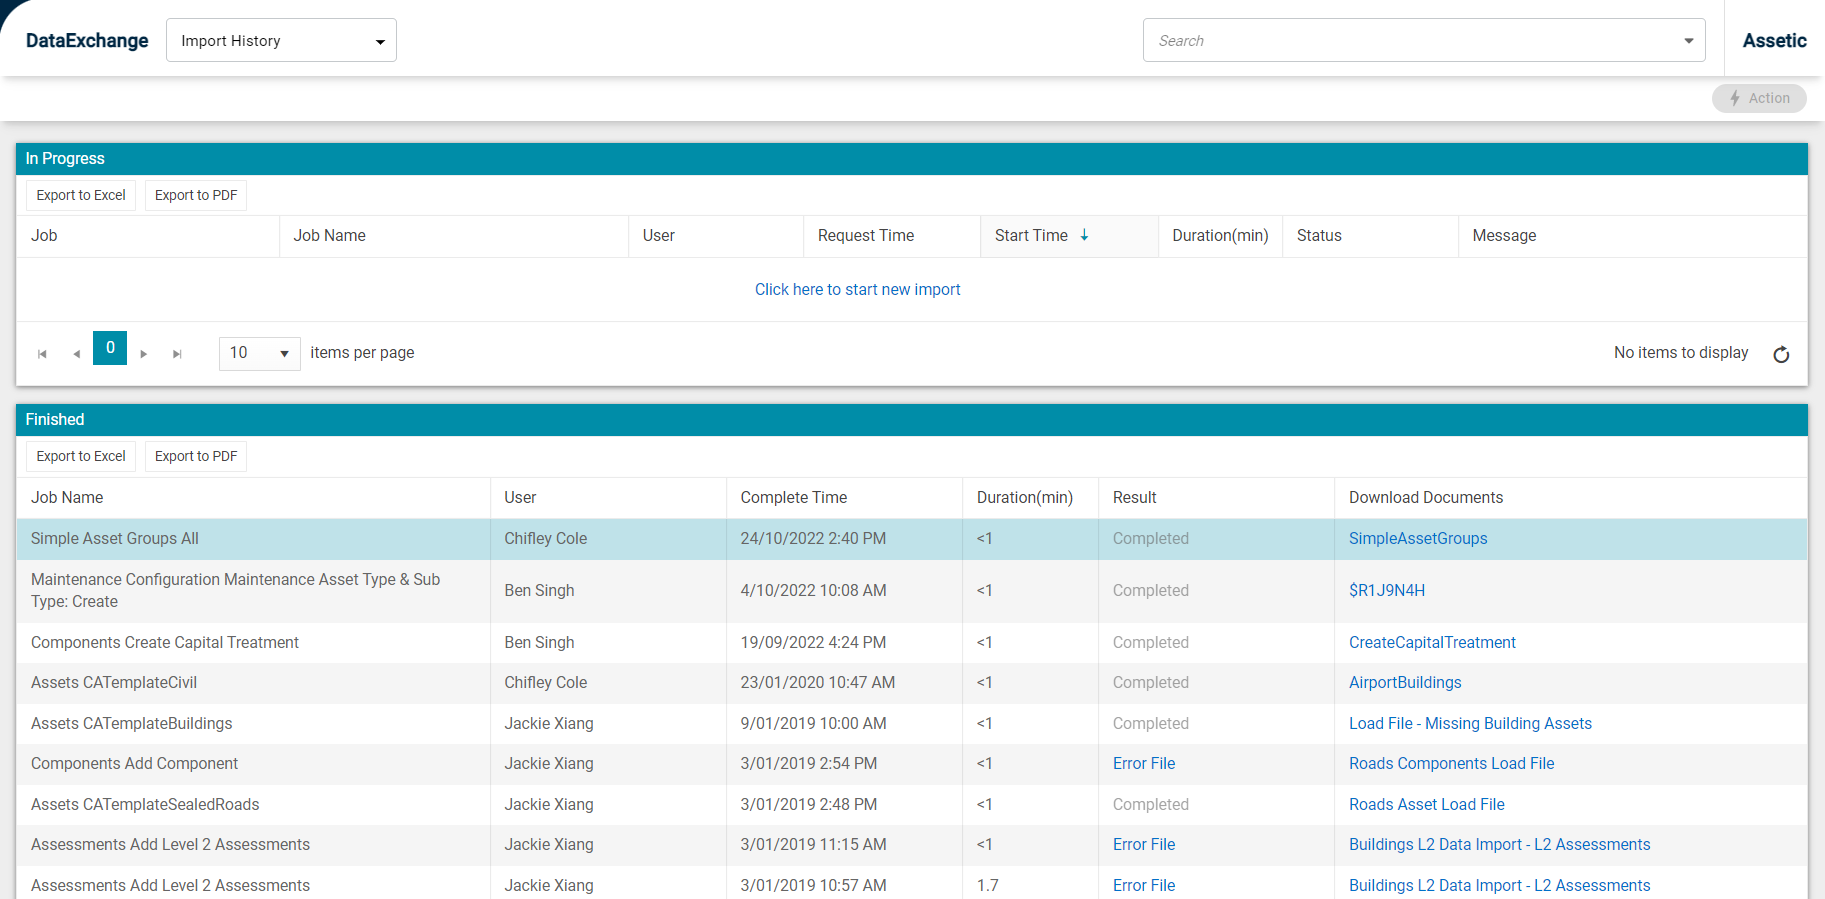
Any errors will be saved in a downloadable Error File. This will contain any data entries from the import that contained an error, including a detailed error message of the failure reason. Errors can be fixed directly in the error file, and then re-imported, as only the rows with an error will need to be re-imported.
Selecting a job entry from the Finished window will also provide a summary of the task results below the Finished window. This can provide a useful summary of the import task results including a total number of additions, updates, and errors.